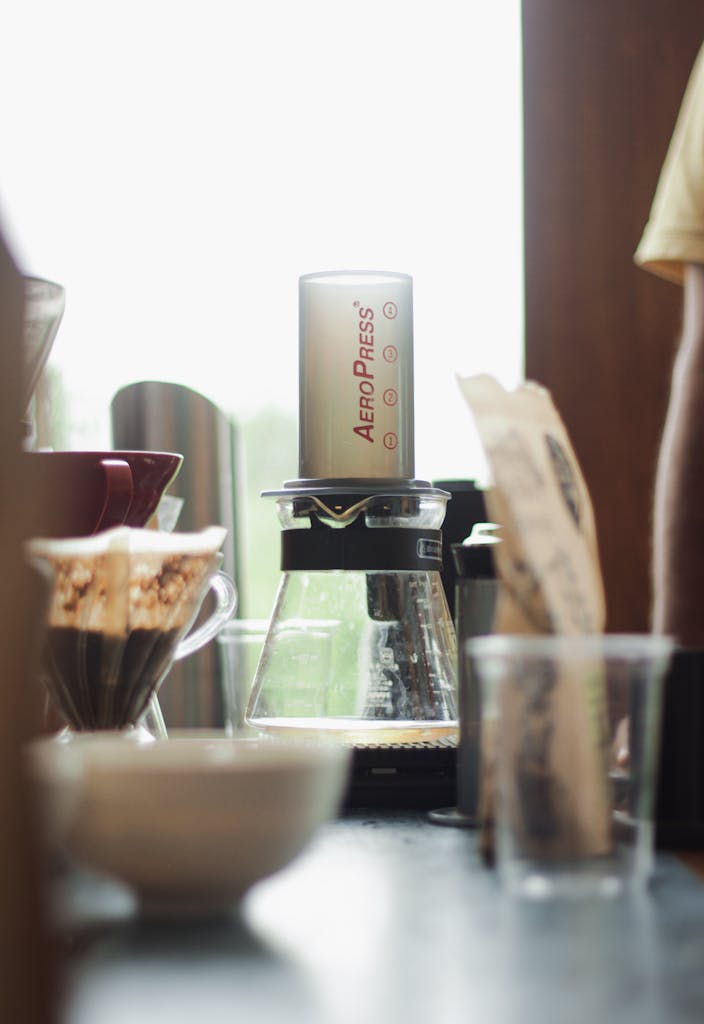
Why Choose Cold Brew with AeroPress
Making cold brew with an AeroPress is a game-changer for coffee lovers. It’s quick, easy, and perfect for those who want a rich, smooth cup without the usual bitterness or acidity. If you’ve got a busy schedule or a sensitive stomach, this method’s for you.
Cold brew traditionally takes hours, but with an AeroPress, you’ll have a refreshing cup in a fraction of the time. The compact design makes it simple to create a single-serving batch, so you don’t end up with more coffee than you can drink.
- Quick Brewing: Ready in minutes, not hours.
- Rich Flavor: Smooth and full-bodied, thanks to the precise AeroPress extraction.
- Lower Acidity: Gentle on the stomach, perfect for sensitive drinkers.
- Convenience: No need for bulky equipment or large batches.
Ready to dive into the world of AeroPress cold brew? Let’s get brewing!
Essential Equipment for AeroPress Cold Brew
To make a killer cold brew with an AeroPress, you’ll need a few key pieces of equipment. Each item plays a crucial role in ensuring you get that smooth, rich flavor without the bitterness. Here’s what you need:
- AeroPress: The star of the show. Its design allows for quick, precise extraction, making it perfect for cold brew.
- Coffee Grinder: Freshly ground coffee beans are essential. A burr grinder is ideal for consistent grind size, which affects flavor and extraction.
- Scale: Precision is key. Use a scale to measure your coffee and water accurately. It’s all about getting the right ratio.
- Filters: The AeroPress comes with its own filters, but you might want to experiment with metal or reusable cloth filters for different textures and flavors.
Optional tools to elevate your brew:
- Wide-Spouted Kettle: Easier pouring with better control. It helps evenly saturate the coffee grounds.
- Cold Brew Bottle or Jar: For storing your cold brew concentrate. Airtight containers keep your brew fresh and flavorful.
Each of these tools contributes to a seamless brewing process, transforming your coffee experience. The AeroPress extracts the best flavors quickly, while the grinder ensures consistency. The scale helps you nail the perfect ratio, and filters let you tweak the mouthfeel. For more tips and guides on using the AeroPress, you can explore our Aeropress coffee brewing techniques. Ready to gear up? Let’s move on to the brewing steps!
Step-by-Step Guide to Making Cold Brew with AeroPress
Making cold brew with an AeroPress is simple and quick. Follow these steps to brew a smooth, rich cup every time.
- Gather Ingredients and Equipment: You’ll need an AeroPress, a coffee grinder, medium-fine coffee beans, room temperature or cold water, and a stirrer.
- Grind Your Coffee: Use a burr grinder to achieve a medium-fine grind. One rounded scoop of coffee (about 15-17 grams) works well for this method.
- Set Up the AeroPress: Place the AeroPress on a sturdy mug or jar. Insert a filter into the filter cap and attach it to the AeroPress.
- Add Coffee: Pour the ground coffee into the AeroPress chamber.
- Add Water: Pour water up to the (4) mark on the AeroPress chamber. Make sure the water is room temperature or cold.
- Stir: Stir the coffee and water mixture briskly for about one minute. This helps with extraction and ensures all grounds are saturated.
- Insert the Plunger: Place the plunger into the chamber and slowly press down. You should feel resistance, which is normal. This process should take about 30 seconds.
- Serve and Enjoy: Your cold brew concentrate is ready. Drink it as is, over ice, or dilute it with water or milk to your taste.
Variations
- Inverted Method: For a different technique, try the inverted method. Assemble the AeroPress upside down, add coffee and water, stir, and let it steep for 1-2 minutes before pressing. This method can enhance the flavor and body of your cold brew.
- Long Steep Method: For a more traditional cold brew, mix coffee and water, let it steep in the fridge for 8-20 hours, then press it into a carafe. This gives a stronger, more concentrated brew.
Experiment with these methods to find what suits your taste best. Enjoy the process and the delicious results! For more comprehensive brewing techniques and best practices, explore our brewing archives at EAU NOIRE.

Optimizing Grind Size for AeroPress Cold Brew
Grind size matters when making cold brew with an AeroPress. It affects flavor extraction, texture, and ease of plunging. For AeroPress cold brew, a medium grind is ideal. It strikes a balance between flavor and ease of use.
A finer grind increases surface area, which can lead to over-extraction. This might cause bitterness and make plunging difficult. On the other hand, a coarser grind reduces surface area, risking under-extraction and a weaker flavor.
Tips for Adjusting Grind Size:
- Start with Medium Grind: This is your baseline. It’s coarser than espresso but finer than French press.
- Taste and Adjust: If your brew is too bitter, try a coarser grind. If it’s too weak, go finer.
- Consider Bean Type: Different beans react differently. Experiment with your favorite beans to find the perfect grind.
- Grinder Quality: Use a burr grinder for consistent results. Blade grinders can produce uneven particles, affecting extraction and flavor. For those using the Baratza Encore, understanding the grind settings for this versatile grinder can help you achieve the perfect grind size for your AeroPress cold brew.
Finding your perfect grind takes some trial and error. But once you nail it, your AeroPress cold brew will be smooth, rich, and satisfying. Happy brewing!
Choosing the Right Beans and Ratios
Picking the right beans and ratios is crucial for a great AeroPress cold brew. The beans you choose will shape the final flavor, so let’s get it right.
Medium-dark to dark roast beans work best. They have lower acidity and bring out those sweet, chocolatey flavors we all love. If you’re feeling adventurous, try natural processed beans. They add depth and complexity to your brew.
- Medium-Dark to Dark Roast: Lower acidity, sweet and chocolatey.
- Natural Processed Beans: Deeper, more complex flavors.
Now, let’s talk ratios. The ideal coffee-to-water ratio for AeroPress cold brew is 1:8. This means for every gram of coffee, use 8 grams of water. It’s a good starting point, but you can tweak it based on your taste.
- Standard Ratio: 1 gram of coffee to 8 grams of water.
- Example: 15 grams of coffee with 120 grams of water.
Want a stronger brew? Increase the coffee amount a bit. Prefer it milder? Add more water. It’s all about finding that sweet spot for your palate.
- Stronger Brew: Increase coffee amount slightly.
- Milder Brew: Add more water.
Choosing the right beans and getting the ratios just right can make all the difference. Experiment with different beans and ratios until you find your perfect cup. For those interested in how water quality can impact your brew, our in-depth exploration of water quality and its effects on coffee offers valuable insights. Enjoy the process and happy brewing!
Cold Brew vs Iced Coffee
Cold brew and iced coffee might seem similar, but they’re worlds apart. Understanding these differences can elevate your coffee game.
Cold brew involves steeping coarsely ground coffee in cold water for an extended period, usually 12-24 hours. This slow extraction process results in a smooth, full-bodied drink with lower acidity and bitterness. The result? A coffee that’s gentle on the stomach and packed with rich flavors.
Iced coffee, on the other hand, is just regular brewed coffee that’s cooled and served over ice. It’s quicker to make but can be more acidic and bitter due to the hot extraction process. If you love the traditional coffee taste but want it cold, iced coffee is your go-to.
- Cold Brew: Smooth, low acidity, steeped in cold water for longer periods.
- Iced Coffee: Quick to make, higher acidity, brewed hot and then cooled.
Both methods are customizable. Want to add some flair to your cold brew? Try adding milk, milk alternatives, or flavorings like vanilla or caramel. For iced coffee, you can shake it with ice to aerate it or add sweeteners like maple syrup.
- Cold Brew Customizations: Milk, milk alternatives, flavorings, sweeteners.
- Iced Coffee Customizations: Shaken with ice, milk, sweeteners.
Each method has its unique charm. Cold brew is perfect for those who prefer a smooth, mellow drink, while iced coffee is great for a quick, refreshing pick-me-up. Experiment with both to see which suits your taste best.

Common Challenges and Tips for AeroPress Cold Brew
Making cold brew with an AeroPress is straightforward, but you might face some challenges. Here are common issues and tips to perfect your brew.
Uneven Extraction: If your cold brew tastes inconsistent, it might be due to uneven extraction. Make sure you stir the coffee and water mixture thoroughly. Stirring helps saturate all the grounds, ensuring balanced flavor.
Dripping Issues: Sometimes, the AeroPress starts dripping before you press. To avoid this, use double filters. This creates a better seal and minimizes early dripping.
Messy Process: Handling the AeroPress can sometimes get a bit messy. Avoid overfilling the chamber and press gently to prevent spills. Also, pressing over a sink or using a larger mug can help contain any mess.
Steeping Time: Adjusting steeping time can change the strength of your cold brew. If you prefer a stronger brew, let it steep for a few extra minutes before pressing. For a milder taste, reduce the steeping time.
Filter Clogging: Fine grounds can clog the filter, making it hard to press. Use a medium grind size to avoid this issue. If clogging still happens, try using a coarser grind. For more detailed advice on grind sizes and their impact on brewing methods, you can explore our blog post on Baratza Encore grind settings.
Plunger Resistance: Feeling too much resistance while pressing? This can be due to grind size or filter issues. Ensure your grind size is medium and the filter is properly seated. Press slowly and steadily to avoid excessive pressure.
Consistent Results: Achieving consistent results can be tricky. Use a scale to measure your coffee and water accurately every time. Consistency in measurements leads to consistency in flavor.
Quick Tips:
- Thorough Stirring: Ensures even extraction.
- Double Filters: Prevents early dripping.
- Gentle Pressing: Reduces mess and spillage.
- Adjust Steeping Time: Tailors brew strength.
- Medium Grind Size: Avoids filter clogging.
- Accurate Measurements: Ensures consistent flavor.
By addressing these common challenges and using these tips, you’ll be able to perfect your AeroPress cold brew technique. Enjoy the process and the delicious results!
Recap and Benefits of AeroPress Cold Brew
Making cold brew with an AeroPress offers a unique twist on your coffee routine. We’ve covered everything from essential equipment to optimizing grind size and choosing the right beans. The AeroPress shines with its quick brewing time and rich, sweet flavor profile.
Benefits of using an AeroPress for cold brew:
- Quick Brewing: Ready in minutes.
- Rich Flavor: Sweet and chocolatey, with lower acidity.
- Convenience: Compact and easy to use.
- Versatility: Perfect for experimenting with different techniques.
Experiment with different beans, grind sizes, and brewing methods. Whether you’re a beginner or a seasoned enthusiast, AeroPress cold brew is versatile and enjoyable. Dive into the world of cold coffee with AeroPress and share your brewing adventures.

